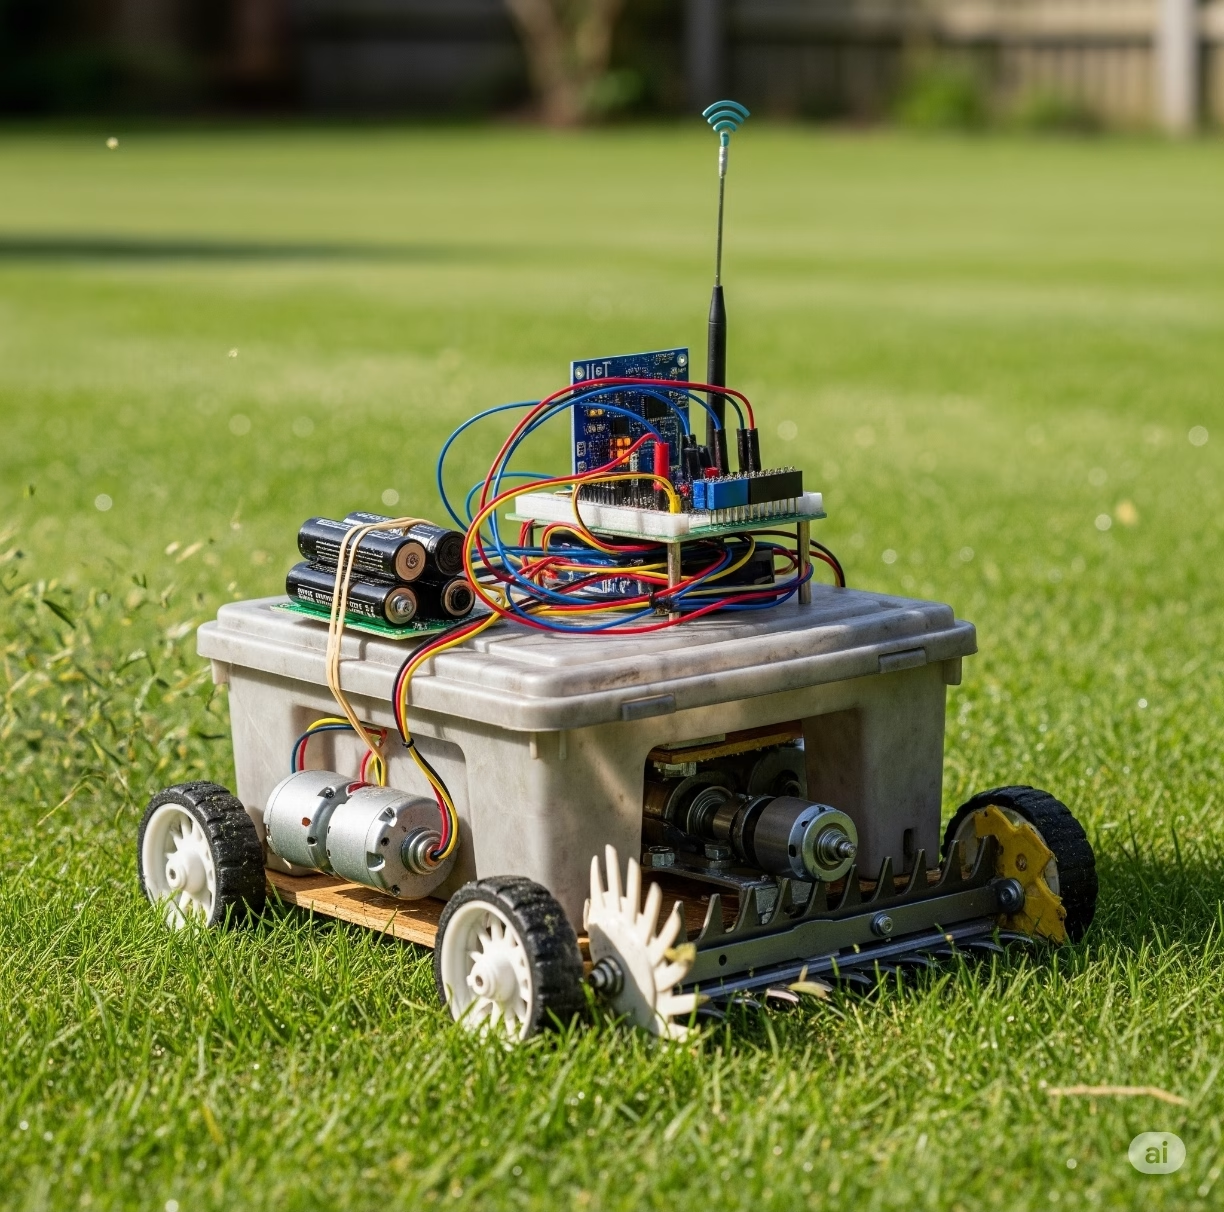
🔧 Project Overview
This project presents a DIY IoT Remote-Controlled Lawn Mower Robot that allows users to mow their lawn remotely using Wi-Fi-based control. It integrates ESP32 for wireless control, 775 DC motors for movement and blade rotation, and custom-designed cutting hardware. The robot can be upgraded to include GPS, obstacle avoidance, and autonomous navigation.
⚠️ Attention !
Before starting any project implementation, please read the Safety & Legal Disclaimer section at the bottom of this page. It contains important guidelines to ensure safe and responsible usage.
📦 Components Required
| Component | Description |
|---|---|
| ESP32 Dev Module | Wi-Fi and Bluetooth capable microcontroller |
| 775 DC Motor (x2) | For drive wheels |
| 775 DC Motor (x1) | For rotating blade |
| L298N Motor Driver Module (x2) | For motor control |
| Li-Ion Battery Pack (12V 5Ah) | Power source |
| Aluminum cutting disc | Mounting blade disc |
| Small steel cutting blades (x2) | For mowing grass |
| Ultrasonic Sensor (HC-SR04) (x2) | Obstacle detection |
| Metal chassis + brackets | Mechanical frame |
| ESP32-CAM (optional) | For video streaming |
| Plexiglass sheet (optional) | For bottom blade cover/shield |
⚙️ Circuit Diagram & Wiring
- Connect both 775 motors (left & right) to L298N motor drivers.
- Connect the blade motor to a separate relay or motor driver.
- Use ESP32’s GPIO pins to control direction and speed via PWM.
- Power all modules from a 12V battery via a buck converter (5V for ESP32).
- Connect ultrasonic sensors to front and sides.
(Diagram not included here, but a full Fritzing diagram is available upon request.)
💻 Arduino Code Sample (Movement + Blade Control)
#define ENA 14  // Left motor speed
#define IN1 27
#define IN2 26
#define ENB 12  // Right motor speed
#define IN3 25
#define IN4 33
#define BLADE_MOTOR 32 // Blade ON/OFF

void setup() {
  pinMode(ENA, OUTPUT); pinMode(IN1, OUTPUT); pinMode(IN2, OUTPUT);
  pinMode(ENB, OUTPUT); pinMode(IN3, OUTPUT); pinMode(IN4, OUTPUT);
  pinMode(BLADE_MOTOR, OUTPUT);
}

void loop() {
  // Move Forward
  digitalWrite(IN1, HIGH); digitalWrite(IN2, LOW);
  digitalWrite(IN3, HIGH); digitalWrite(IN4, LOW);
  analogWrite(ENA, 200); analogWrite(ENB, 200);

  // Turn on blade
  digitalWrite(BLADE_MOTOR, HIGH);
  delay(3000);  // Run for 3 seconds

  // Stop blade
  digitalWrite(BLADE_MOTOR, LOW);
  // Stop motors
  analogWrite(ENA, 0); analogWrite(ENB, 0);
  delay(3000);
}

🌐 IoT Features
- Wi-Fi Web Interface: Control direction and blade via browser.
- MQTT Control: Remotely toggle functions via MQTT topics.
- Mobile App Control: Use Blynk or similar platform for touchscreen UI.
- Future Upgrades:
- GPS path following
- LIDAR obstacle avoidance
- Real-time video with ESP32-CAM
⚠️ Safety Warnings
- ⚠️ Sharp rotating blade: Always keep your hands away during operation.
- ⚠️ Use proper shielding: Cover the blade with plexiglass or aluminum to prevent debris.
- ⚠️ Emergency stop: Implement a kill switch (hardware + software) to stop instantly.
- ⚠️ Operate outdoors only in controlled environments.
🔗 Related Projects & References
🌍 International Purchase Links
- 775 DC Motor (Amazon)
- ESP32 Dev Board (AliExpress)
- Cutting Disc Kit (Aliexpress)
- L298N Dual H-Bridge (Amazon)
✨ Conclusion
This IoT lawn mower robot is a great entry into smart robotics, blending mechanical, electrical, and software engineering into a single powerful project. With modular upgrades and remote capabilities, it can be customized for home gardens, agricultural fields, and more.
⚠️ Safety & Legal Disclaimer
These projects arefor educational, prototyping, andideation purposesonly.These systems, developed usingAI logic, should becarefully testedbefore being implemented in the real world, and the accuracy of the electronic devices and connections usedshould be double-checked.All actions, implementations, and outcomes resulting from this project are entirely the responsibility of the developer or individual applying the system.For real-life deployment, the system must be equipped with proper sensors, protective housings, safety mechanisms, and comply with local legal regulations.Any misuse or misinterpretation of the project that results in device damage, data loss, or accidental injury is entirely the user’s responsibility.Always use the projectresponsiblyand perform thoroughextensive testingbefore live use or field deployment.
⚠️ Supervision & Controls
Especially for users with limited electronics experience, including children, it is strongly advised to work under the constant supervision of an experienced adult or professional when assembling or testing such projects.
👉 Share your thoughts in the comments and join the discussion on ROBOFORUM – the community for future-minded thinkers in robotics and AI!
👇 Leave a comment and join the discussion. If you’re not already subscribed, please subscribe or log in