Below is a beginner-friendly and practical solar-powered cooling project using Arduino. It includes background theory, components, circuit diagram, and sample code.
A beginner-friendly project to understand how solar energy can be used for temperature-based cooling.
📘 What You’ll Learn
- How to use solar panels to power an Arduino system
- How to control a cooling fan based on real-time temperature readings
- Introduction to DHT22 temperature sensor
- Basic use of MOSFETs for controlling fan power
- How solar thermal energy can be applied in smart cooling
🧠 Background: How Solar Cooling Works (Brief)
Traditional solar cooling systems use thermal energy (heat) to activate cooling cycles like absorption or adsorption, but those are complex for beginners. In this simple Arduino-based project, we simulate the concept by using:
- A solar panel to provide power
- A fan to create a cooling effect
- A sensor to detect temperature and activate the fan automatically
🔩 Components Needed
| Component | Quantity |
|---|---|
| Arduino Uno (or Nano) | 1 |
| DHT22 Temperature & Humidity Sensor | 1 |
| 5V DC Fan | 1 |
| N-Channel MOSFET (e.g., IRF540N) | 1 |
| Solar Panel (6V 1W or higher) | 1 |
| Diode (1N4007) | 1 |
| Capacitor (optional for voltage smoothing) | 1 |
| Breadboard & Wires | – |
Here’s the connection diagram explanation
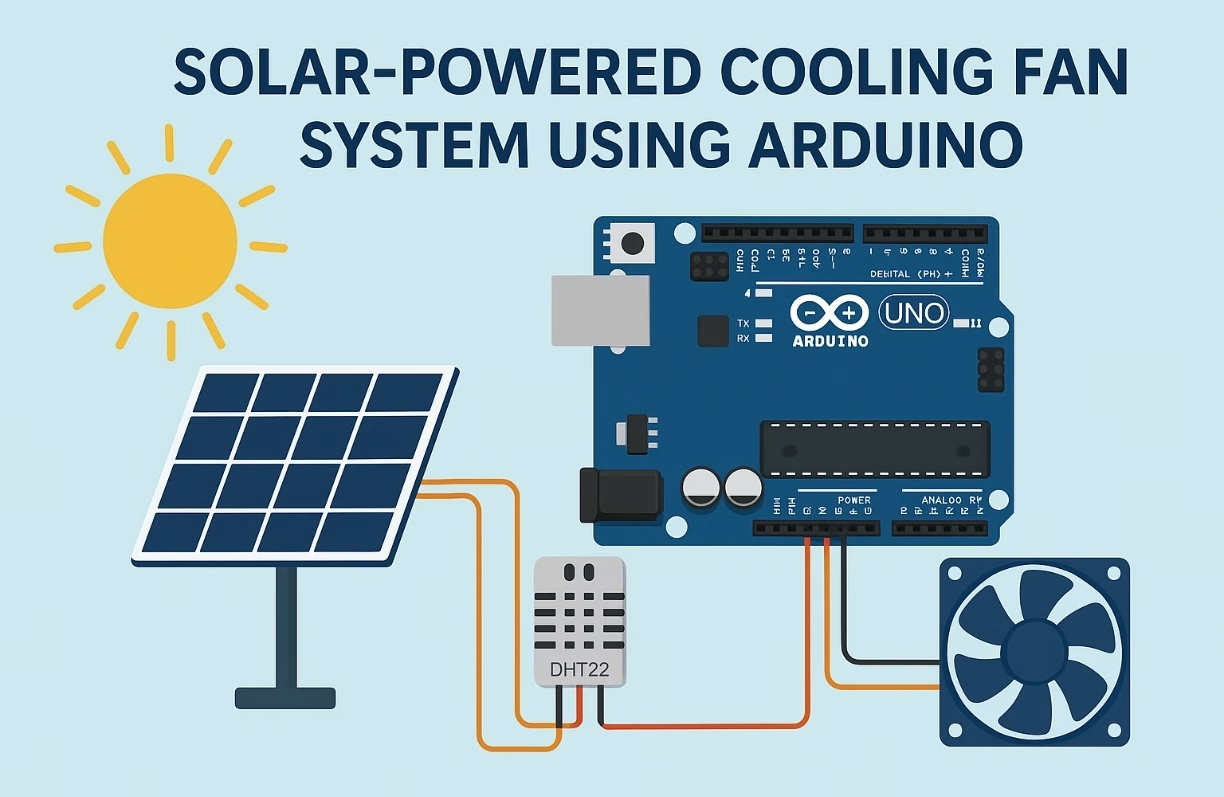
Solar-Powered Smart Cooling System: Wiring Diagram Explanation
This guide provides a detailed, step-by-step text-based explanation of how to wire your solar-powered smart cooling system using an Arduino Uno, DHT22 sensor, DC fan, and MOSFET on a breadboard.
1. Prepare Your Breadboard Power Rails
- Top Long Rail (Positive / Red Wire Line): This rail typically serves as your 5V or positive power input line.
- Bottom Long Rail (GND / Negative / Blue or Black Wire Line): This rail is commonly used for all your ground connections.
2. Solar Panel and Diode Connections
- Solar Panel Positive (+) Output: Connect this wire to the anode of the 1N4007 Diode (the side without the silver band on the diode).
- 1N4007 Diode Cathode (Silver Band Side): Connect this side of the diode to the top long positive (red) power rail of your breadboard. This diode prevents current from flowing back to the solar panel when it’s not illuminated.
- Solar Panel Negative (-) Output: Connect this wire to the bottom long GND (blue/black) rail of your breadboard.
3. Arduino Uno Connections
- Arduino Vin Pin: Connect this pin to the top long positive (red) power rail of your breadboard. The power from the solar panel will supply your Arduino.
- Arduino GND Pin: Connect any GND pin on your Arduino to the bottom long GND (blue/black) rail of your breadboard.
- Arduino D2 Pin: Connect this pin to the “Data” pin of your DHT22 Temperature/Humidity Sensor.
- Arduino D6 Pin: Connect this pin to the “Gate (G)” pin of your N-Channel MOSFET.
4. DHT22 Temperature & Humidity Sensor Connections
- DHT22 VCC Pin: Connect this pin to the top long positive (red) power rail of your breadboard.
- DHT22 GND Pin: Connect this pin to the bottom long GND (blue/black) rail of your breadboard.
- DHT22 Data Pin: Connect this pin to the D2 pin of your Arduino.
5. DC Fan and N-Channel MOSFET (IRF540N) Connections
- 5V DC Fan Positive (+) Wire: Connect this wire to the top long positive (red) power rail of your breadboard.
- 5V DC Fan Negative (-) Wire: Connect this wire to the “Drain (D)” pin of your N-Channel MOSFET.
- N-Channel MOSFET “Gate (G)” Pin: Connect this pin to the D6 pin of your Arduino.
- N-Channel MOSFET “Source (S)” Pin: Connect this pin to the bottom long GND (blue/black) rail of your breadboard.
6. Optional Capacitor (for Voltage Smoothing)
- If you’re using one, connect the longer leg (positive) of an electrolytic capacitor (typically 100uF or larger) to the top positive (red) power rail of your breadboard, and its shorter leg (negative) to the bottom GND (blue/black) rail. This helps smooth out voltage fluctuations.
This detailed explanation should help you visualize and wire up your project.

⚙️ Wiring Diagram
[ Solar Panel ] --> [ Diode ] --> [ 5V Line to Arduino Vin ]
                                 \
                                  +----> [ Fan ] --> [ Drain (MOSFET) ]
                                           |
                                       [ Source (MOSFET) ] --> GND
                                       [ Gate (MOSFET) ] <-- Arduino D6

[ DHT22 ] --> VCC to 5V, GND to GND, Data to D2
💻 Arduino Code Example
#include "DHT.h"

#define DHTPIN 2
#define DHTTYPE DHT22
#define FAN_PIN 6

DHT dht(DHTPIN, DHTTYPE);

void setup() {
  Serial.begin(9600);
  dht.begin();
  pinMode(FAN_PIN, OUTPUT);
  digitalWrite(FAN_PIN, LOW);
}

void loop() {
  float temp = dht.readTemperature();
  if (isnan(temp)) {
    Serial.println("Failed to read temperature");
    return;
  }

  Serial.print("Temperature: ");
  Serial.print(temp);
  Serial.println(" °C");

  if (temp > 30.0) { // Fan ON above 30°C
    digitalWrite(FAN_PIN, HIGH);
  } else {
    digitalWrite(FAN_PIN, LOW);
  }

  delay(2000);
}
📷 Optional Extension
You can add an OLED screen to display temperature or log data via SD card or Wi-Fi (ESP32 version).
You can also power a Peltier Module for actual cooling instead of a fan (for advanced users).
🧪 Real-World Learning Outcomes
- How to integrate renewable energy (solar) into embedded systems
- Understanding temperature control logic
- Simple MOSFET switching for DC loads
- Applying sustainability concepts in electronics
🌐 Want More Projects Like This?
🔥 Comment your ideas & share your results!
📥 Log in to explore full project guides:
👇 Leave a comment and join the discussion. If you’re not already subscribed, please subscribe or log in
⚠️ Safety & Legal Disclaimer
This project is for educational and prototyping purposes only.
- AI logic should be carefully tested before being automatically implemented.
- All operations and applications performed in these projects are the responsibility of the project developer.
- For real-world applications, the system must be equipped with sensors, protective enclosures, and comply with legal regulations.
- Any resulting damage, misuse, or misinterpretation of data, devices, or others is the sole responsibility of the user.
Please use the project responsibly and conduct thorough testing before field implementation.
Supervision and Control
It is strongly recommended that children, especially those with limited electronic knowledge, work under the constant supervision and control of an adult or experienced professional when engaging with such projects.