🧠 A Fun Introduction to Coding for Kids
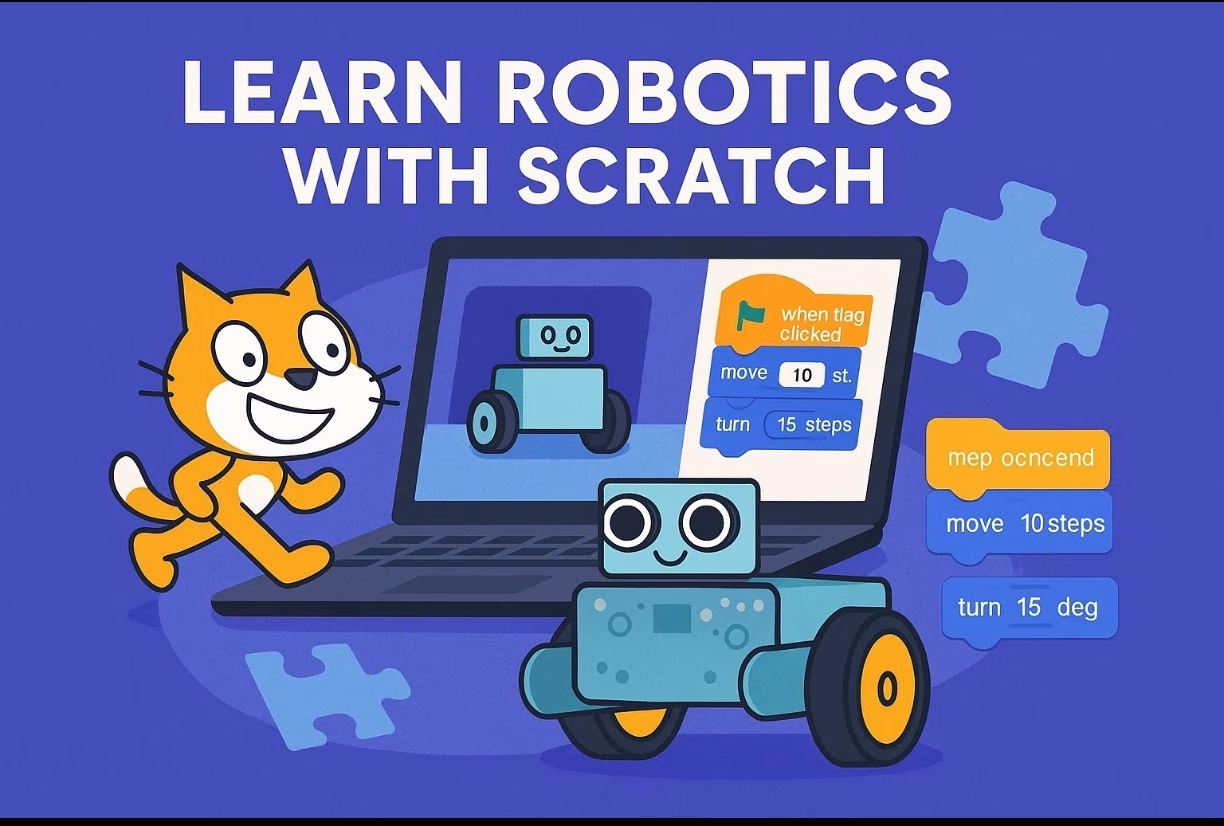
Robotics and programming are no longer just for engineers—they’re for kids too! And the best place to start is with Scratch, a beginner-friendly, visual coding platform developed by MIT. It uses drag-and-drop blocks that allow children to learn the logic of coding without writing a single line of text-based code.
In this blog post, you’ll discover how Scratch can be used to program real robots, even if you’re just getting started.
Scratch is a block-based programming language designed for kids aged 7 and up. It allows users to create animations, games, and interactive stories. But with the right tools, Scratch can also control physical robots, making learning even more exciting!
🔌 Robots You Can Control with Scratch
Scratch is compatible with a variety of educational robotics kits and devices. Here are some popular ones:
| Robot | Description |
|---|---|
| mBot | A simple robot by Makeblock that works seamlessly with Scratch via the mBlock software. |
| LEGO WeDo / Mindstorms | LEGO’s educational kits that can be programmed using Scratch extensions. |
| BBC micro:bit | A tiny programmable computer that connects to Scratch via Bluetooth. |
| Arduino | Using Scratch for Arduino (S4A) or ScratchX, basic circuits and sensors can be controlled. |
🧩 How to Program Robots Using Scratch
1. Connect Your Robot
Make sure your robot is connected to your computer via USB or Bluetooth. Some robots require drivers or firmware updates before being used with Scratch.
2. Enable the Scratch Extension
Open Scratch 3.0 and click on the “Extensions” icon. Add the relevant extension for your robot (e.g., mBot, micro:bit).
3. Start Coding with Blocks
Use blocks such as:
- “When green flag clicked” for starting the program.
- “Move forward” or “Turn right” for robot movement.
- “If/then” conditions to make your robot respond to sensors.
4. Run and Test
Click the green flag and watch your robot come to life! Adjust the code if needed and experiment with different inputs.
Below is a detailed and beginner-friendly guide to learning Scratch, written in a clear web-friendly format with sections, examples, and visuals explained step-by-step.
🧑💻 Complete Beginner’s Guide to Scratch Programming (Step-by-Step)
🌟 What Is Scratch?
Scratch is a free, block-based coding platform where you can create games, animations, interactive stories, and more — without writing any code. Everything is done by dragging colorful coding blocks.
Website: https://scratch.mit.edu
💡 Why Use Scratch?
- ✅ Easy to learn — perfect for beginners
- ✅ No typing or coding errors
- ✅ Interactive and fun
- ✅ Teaches logic and creativity
🧭 How to Start with Scratch
✅ Step 1: Open Scratch
- Go to https://scratch.mit.edu
- Click on “Create” (top menu).
- Scratch will open with:
- A cat sprite (your character)
- An empty stage
- Code blocks on the left
🧱 Understanding the Scratch Interface
| Part | Description |
|---|---|
| Stage | Where your animations and games happen |
| Sprites | Characters or objects you control |
| Blocks Palette | The menu of colorful code blocks |
| Code Area | Where you drag blocks to build your program |
| Green Flag | Starts the project |
| Red Stop Sign | Stops the project |
🔗 How Scratch Projects Work (Connection & Logic)
Scratch code is built like puzzle pieces that fit together.
Structure Example:
[When Green Flag Clicked]
→ Start (event happens)
[Move 10 steps]
→ Action
[Repeat 10]
→ Loop (repeats action 10 times)
Blocks connect vertically and run top to bottom. This creates a sequence of instructions.
🛠️ Your First Project – Make the Cat Move and Talk
Let’s build a mini project step-by-step.
🎯 Goal:
When you click the green flag, the cat will say “Hello!” and move around in a circle.
🪜 Step-by-Step Instructions:
- Click the Cat (sprite).
- Go to the “Events” category on the left.
- Drag
[when green flag clicked]to the code area.
- Drag
- Go to “Looks”.
- Drag
[say "Hello!" for 2 seconds]under the event block.
- Drag
- Go to “Motion”.
- Drag
[move 10 steps] - Drag
[turn 15 degrees]
- Drag
- Go to “Control”
- Drag
[repeat 10]and put the move + turn blocks inside it.
- Drag
🧩 Final Code:
when green flag clicked
say "Hello!" for 2 seconds
repeat 10
    move 10 steps
    turn 15 degrees
✅ What Happens?
- The cat says “Hello!”
- Then moves in a small circle (because of move + turn in a loop)
🔁 Learn More by Playing
You can change the blocks to try new things:
| Try This | What It Does |
|---|---|
Change say "Hello!" to anything | The cat will say something different |
Increase move 10 steps | The cat moves faster or farther |
Change repeat 10 to repeat 30 | The loop runs longer |
🎨 How to Add Sprites and Backgrounds
Add a New Sprite:
- Click the “Choose a Sprite” button (bottom right)
- Pick a new character (e.g., dog, ball, dragon)
Add a Background:
- Click the “Choose a Backdrop” button
- Select a background like forest, city, or underwater
Now your story or game will have scenery and multiple characters!
🔌 Connecting Blocks: How Scratch Works Behind the Scenes
Scratch projects are built using blocks that snap together. Here’s how they connect:
🧠 Logic Flow:
- Event block starts it:
[when green flag clicked] - Action blocks do things:
[move],[say],[play sound] - Control blocks manage how long or how often:
[repeat],[wait],[if]
All these blocks are connected vertically — and the order matters.
🎮 What Can You Build with Scratch?
You can build almost anything! Examples:
| Project Type | Examples |
|---|---|
| Games | Maze runner, pong, catch the apple |
| Animations | Dancing cat, growing flowers |
| Stories | Interactive fairy tales, comic book scenes |
| Quizzes | Ask questions and check answers |
| Music Projects | Play instruments, create beats |
🔐 Where Is Data Stored in Scratch?
- All your projects are saved online if you sign in.
- You can share your projects and get feedback from other creators.
- You can also download your project to your computer as a
.sb3file.
🧠 Pro Tip: Start Small and Build Up
Don’t try to make a big game right away. Start with small challenges like:
- Make the sprite bounce when it hits the edge.
- Make a sprite follow your mouse.
- Make a button that starts music.
Let’s make your sprite bounce when it hits the edge of the screen in Scratch. 🏓
This is a classic and fun beginner project. I’ll walk you through it step by step, with web-style formatting, fully explained for learning and practice.
🚀 Scratch Project: Make a Sprite Bounce When It Hits the Edge
🎯 Goal
Create a project where a sprite (like the default cat) moves around automatically and bounces back when it reaches the edge of the screen.
🛠️ What You Will Learn
✅ Continuous motion
✅ Edge detection
✅ Bounce behavior
✅ Loops and control blocks
🖥️ Set Up Your Project
Step 1: Open Scratch
- Visit https://scratch.mit.edu
- Click “Create”
- The default sprite (Scratch Cat) appears — you’ll use this one.
🧱 Step 2: Add the Movement and Bounce Code
📦 Drag and connect these blocks:
- From the Events category:
Drag:[when green flag clicked] - From the Motion category:
Drag:[point in direction (90)] - From the Control category:
Drag:[forever] - Inside the forever loop, drag these from Motion:
[move (10) steps]
[if on edge, bounce]
📄 Final Code Block (Readable View):
when green flag clicked
point in direction (90)
forever
    move 10 steps
    if on edge, bounce
🧪 What Does Each Block Do?
| Block | What It Does |
|---|---|
when green flag clicked | Starts the action when the green flag is pressed |
point in direction (90) | Points the sprite to the right (90°) |
forever | Repeats the blocks inside forever |
move (10) steps | Moves the sprite forward 10 steps |
if on edge, bounce | Makes the sprite bounce off the edge and change direction |
🧠 Behind the Scenes (Logic)
The combination of:
- Moving forward
- Forever loop
- Edge detection
… creates a realistic bouncing movement. The sprite keeps moving and changes direction when it hits any border of the screen.
🖼️ Want to Customize It?
Try these cool add-ons:
- 🎵 Add a sound when it bounces:
Add inside theforeverloop:if on edge, bounce play sound "pop" - 🌈 Change color on bounce:
if on edge, bounce change color effect by 25 - 🧊 Slow it down: Add a wait:
wait (0.1) seconds
✅ Summary
With just a few blocks, you’ve built a fully working bounce animation!
| Concepts Used | Explanation |
|---|---|
| Motion | Used to move the sprite |
| Control | Forever loop keeps action going |
| Logic | Bounce checks edge contact |
🧩 Try a Challenge
- Can you make it bounce at a random speed?
- Can you make two sprites bounce in different directions?
- Can you make it keep score when it touches a paddle?
Great! Let’s make your sprite follow your mouse wherever you move it on the screen. 🖱️➡️🐱
This is a fun and simple project in Scratch that teaches real-time motion, sensing, and event-driven behavior.
🧲 Scratch Project: Make a Sprite Follow Your Mouse
🎯 Goal
We want the sprite (like the Scratch Cat) to continuously move toward the mouse pointer as you move the mouse around.
🛠️ What You’ll Learn
✅ Real-time interaction
✅ point towards mouse-pointer block
✅ Smooth movement using loops
✅ Combining direction and steps
🧰 Step-by-Step Instructions
✅ Step 1: Open Scratch
- Go to https://scratch.mit.edu
- Click on “Create”
- Use the default Cat sprite (or add a new one)
✅ Step 2: Add Code to Make Sprite Follow the Mouse
We’ll use motion blocks and a forever loop.
📦 Code Blocks to Use:
- From Events:
[when green flag clicked]
- From Control:
[forever]
- Inside the
foreverblock, go to Motion and add:
[point towards (mouse-pointer)][move (10) steps]
📄 Final Code Structure:
when green flag clicked
forever
    point towards (mouse-pointer)
    move 10 steps
✅ Done! Now press the green flag and move your mouse around the screen — the sprite will follow it like a pet.
🧪 What Does Each Block Do?
| Block | Purpose |
|---|---|
when green flag clicked | Starts the code when the green flag is clicked |
forever | Keeps doing what’s inside over and over |
point towards (mouse-pointer) | Aims the sprite at the mouse |
move (10) steps | Moves the sprite forward in that direction |
💡 Want to Slow It Down?
Change the move block to:
move (3) steps
So it doesn’t move too fast. Or add:
wait (0.05) seconds
Inside the loop for smoother motion.
🌈 Bonus Ideas
Here are some fun things to try:
| Add This | Result |
|---|---|
if touching mouse-pointer + sound | Play sound when it touches mouse |
| Change sprite costume | Make it look like walking |
| Use a ghost effect | Make it look like it’s sneaking |
Example Add-on:
if <touching mouse-pointer> then
    play sound "meow"
end
🧩 Challenge Time!
- Can you make the sprite avoid the mouse instead?
- Can you make the sprite say something when it gets close?
- Can you make it follow only when a key is pressed?
I can help you do all of that!
✅ Summary
You’ve just made an interactive program where a sprite follows your mouse.
You learned:
- How to point toward the mouse
- How to move step by step
- How to use real-time interaction with loops
Let’s create a button that starts music when clicked — like a “Play Music” button in Scratch. 🎵🔘
- This is a great way to learn events, broadcast messages, sprite interaction, and sound blocks.
🔘 Scratch Project: Make a Button That Starts Music
🎯 Goal
When the user clicks on a button (a sprite you design), it plays music or sound.
🛠️ What You Will Learn
✅ How to create a clickable button
✅ How to use when this sprite clicked
✅ How to play sounds and music
✅ Broadcast messages (optional for advanced logic)
✅ Step 1: Open Scratch & Add a Button Sprite
- Go to https://scratch.mit.edu
- Click “Create”
- Click “Choose a Sprite” ➜ Search for Button or create your own using the Paint tool.
💡 You can name it something like “PlayButton”.
🎨 Optional: Design Your Own Button
- Click “Paint New Sprite”
- Use the text tool and write “PLAY”
- Draw a nice colored circle or rectangle background behind it
🔊 Step 2: Add Music or Sound
📦 Add a Sound:
- Click the “Sounds” tab (top of the screen)
- Click “Choose a Sound” (bottom left)
- Pick any sound from the library, like:
Dance AroundPopPianoDrum Beat
🎵 You can preview and choose what you like!
🧱 Step 3: Add Code to Play Music When Clicked
Select the Button Sprite and Add This Code:
when this sprite clicked
play sound [Dance Around v] until done
📄 Code Block Breakdown:
| Block | What It Does |
|---|---|
when this sprite clicked | Starts when the button is clicked |
play sound [music] until done | Plays the selected sound |
💡 Want the Music to Loop?
Instead of playing it once, you can make it loop:
when this sprite clicked
forever
    play sound [Dance Around v] until done
🛑 But you’ll also need a Stop Button to end the music if it loops. Let me know if you want help adding one!
🧩 Optional: Use Broadcast (for Complex Projects)
If you want the button to start music on another sprite, use this method:
In the Button Sprite:
when this sprite clicked
broadcast [start music v]
In Another Sprite (or the Stage):
when I receive [start music v]
play sound [Dance Around v] until done
This separates the button and the music logic.
✅ Summary
You now have a button that plays music when clicked!
| What You Learned | Use |
|---|---|
when this sprite clicked | Detect button click |
play sound | Play music or sound |
| Broadcast (optional) | Communicate between sprites |
🚀 Challenge Ideas
- Add a Stop Music button too!
- Add multiple buttons for different songs
- Change the button appearance when clicked
- Make the button glow or bounce with animation
🔧 Example Projects with Scratch and Robots
Here are a few exciting robotics projects you can build and program using Scratch:
🚗 Line Following Robot
- Use IR sensors to detect black lines.
- Scratch blocks control the motors based on sensor readings.
let’s build a line-following robot in Scratch! This is a fantastic project that combines programming with real-world sensing.
We’ll use Infrared (IR) sensors to detect a black line, and Scratch will then tell your robot’s motors how to move.
Understanding the Line-Following Robot Concept
Imagine your robot has two “eyes” on its underside, looking down at the ground. These are your IR sensors.
- How IR Sensors Work: Over White/Light Surface: The IR light from the sensor bounces off the light surface and returns to the sensor’s receiver. The sensor “sees” this and sends a signal (often a “0” or “LOW” reading).
- Over Black/Dark Line: The black surface absorbs the IR light, so little to no light bounces back. The sensor doesn’t “see” the light return and sends a different signal (often a “1” or “HIGH” reading).
- (Note: Some IR sensors work in reverse, sending “1” for white and “0” for black. You’ll figure this out during testing!)
- The Robot’s Strategy: Both sensors on white: The robot is centered on the line (or off it). It should move straight.
- Right sensor on black, left sensor on white: The robot has drifted to the left. It needs to turn right to get back on the line.
- Left sensor on black, right sensor on white: The robot has drifted to the right. It needs to turn left to get back on the line.
- Both sensors on black: The robot might be at a sharp turn, a crossroad, or completely off the line. For a simple line follower, we’ll usually make it stop or move straight for a moment.
What You’ll Need (Hardware)
To make this truly work, you’ll need: - A robot chassis: Something for your motors and sensors to attach to.
- Two DC motors with wheels: For movement.
- A motor driver module (e.g., L298N): To control the motors’ speed and direction with your microcontroller.
- A microcontroller (e.g., Arduino Uno or ESP32): This is the “brain” that reads the IR sensors and sends commands to the motor driver.
- Two IR Line Follower Sensors: Small modules with an IR emitter and receiver.
- A way to connect your microcontroller to Scratch: This is key! You’ll typically use an extension like Scratch Link (for Scratch Desktop) or specific third-party extensions (like Pico-Go for Raspberry Pi Pico, or mBlock for Arduino, which has its own Scratch-like interface). The specific Scratch blocks will depend on the extension you use.
Easy Teaching with Scratch Blocks (Program Logic) - Let’s assume you have your robot connected to Scratch via an extension that allows you to read sensor values and control motors. For demonstration, I’ll use generic block descriptions.
We’ll define states for our robot based on the two IR sensors: Left Sensor and Right Sensor.
- Setup Your Scratch Project
- Open Scratch: Go to scratch.mit.edu/editor or open your Scratch Desktop app.
- Add Your Microcontroller Extension:
- Click the “Extensions” button in the bottom-left corner (the blue square with two white blocks).
- Select the extension for your microcontroller (e.g., “Arduino” if you’re using something like mBlock, or a specific extension if you’ve installed one for direct Scratch Link communication).
- This will add new blocks to your palette for reading pins and controlling motors.
- Create Variables:
- Go to the “Variables” category.
- Click “Make a Variable” to create:
- Left_Sensor_Reading (for all sprites)
- Right_Sensor_Reading (for all sprites)
- (Optional but helpful for debugging: Robot_State)
- These variables will store whether each sensor is on black (e.g., 1) or white (e.g., 0).
- Main Robot Control Script (Car Sprite)
Let’s assume you have a Car sprite to represent your robot.
when green flag clicked
// Initial setup – make sure your motors are off at the start
// (These blocks will depend on your specific extension)
Set motor L to speed (0) // Stop Left Motor
Set motor R to speed (0) // Stop Right Motor
Wait (1) seconds // Give it a moment to stabilize forever
// 1. Read Sensor Values
// These blocks will come from your microcontroller extension.
// Assuming your sensors output 1 for black line, 0 for white surface.
// Adjust pin numbers (e.g., A0, A1) based on your wiring.
set [Left_Sensor_Reading v] to [Read digital pin (A0)] // Or (digital pin 2) etc.
set [Right_Sensor_Reading v] to [Read digital pin (A1)] // Or (digital pin 3) etc.// 2. Control Motors based on Sensor Readings if <<(Left_Sensor_Reading) = [0]> and <(Right_Sensor_Reading) = [0]>> then // Both on White -> Move Straight Set motor L to speed (50) // Adjust speed as needed Set motor R to speed (50) set [Robot_State v] to [STRAIGHT] else if <<(Left_Sensor_Reading) = [1]> and <(Right_Sensor_Reading) = [0]>> then // Left Sensor on Black, Right on White -> Turn Right Set motor L to speed (0) // Stop Left (or slow it down) Set motor R to speed (50) // Keep Right moving (or speed it up) set [Robot_State v] to [TURN RIGHT] else if <<(Left_Sensor_Reading) = [0]> and <(Right_Sensor_Reading) = [1]>> then // Left Sensor on White, Right on Black -> Turn Left Set motor L to speed (50) // Keep Left moving (or speed it up) Set motor R to speed (0) // Stop Right (or slow it down) set [Robot_State v] to [TURN LEFT] else if <<(Left_Sensor_Reading) = [1]> and <(Right_Sensor_Reading) = [1]>> then // Both on Black -> Stop (or move slightly forward/backward) Set motor L to speed (0) Set motor R to speed (0) set [Robot_State v] to [STOP - On Junction/End] endend
Explanation of the Logic
- when green flag clicked: This is your robot’s “start” button.
- Set motor L/R to speed (0): Always a good idea to ensure motors are off at the very beginning.
- forever loop: This is the heart of your line follower. It makes the robot continuously check its sensors and adjust its movement.
- set [Left_Sensor_Reading v] to [Read digital pin (A0)]: This is where your Scratch program communicates with your physical IR sensors. You’ll need to use the specific block provided by your Scratch extension to read the sensor data from the correct pin on your microcontroller.
- if…else if…else if…else if: This is the decision-making part. The robot checks the combination of its sensor readings:
- (Left_Sensor_Reading) = [0] and (Right_Sensor_Reading) = [0] (Both White): The robot is on the line or has just moved off it. It drives straight ahead.
- (Left_Sensor_Reading) = [1] and (Right_Sensor_Reading) = [0] (Left Black, Right White): The robot has drifted left, so it needs to turn right to get back. We make the right motor move faster or the left motor slower/stop.
- (Left_Sensor_Reading) = [0] and (Right_Sensor_Reading) = [1] (Left White, Right Black): The robot has drifted right, so it needs to turn left. We make the left motor move faster or the right motor slower/stop.
- (Left_Sensor_Reading) = [1] and (Right_Sensor_Reading) = [1] (Both Black): This usually means the robot has encountered a thick part of the line, a junction, or the end of the line. For simplicity, we make it stop. You could make it turn around or make a decision here based on a more complex path.
- Set motor L/R to speed (X): These blocks are how Scratch sends commands to your motor driver via the microcontroller to control the motors. The X value will be a speed (e.g., 0-100 or 0-255 depending on your setup).
Tips for Teaching and Troubleshooting - Start Simple: Don’t try to make the robot follow a complex track immediately. Draw a simple straight line, then a gentle curve.
- Test Sensors First: Before writing the full program, get your Scratch extension working and use the “read sensor” blocks to simply display the Left_Sensor_Reading and Right_Sensor_Reading variables on the stage. Move your robot over black and white to confirm what values (0 or 1) each sensor sends for each color. If your sensors output 0 for black and 1 for white, you’ll need to flip the [0] and [1] in your if conditions!
- Adjust Speeds: The motor speeds (e.g., 50) are crucial for smooth line following. If the robot wobbles too much, lower the speeds. If it’s too slow, increase them.
- Tuning Turns: For turning, you can either:
- Stop one motor and move the other (like in the example).
- Slow down one motor and keep the other at full speed.
- Reverse one motor (if your motor driver allows this in Scratch, for sharper turns).
- Placement of Sensors: The distance between your IR sensors and the black line, as well as the distance between the two sensors, affects performance. Experiment with optimal placement on your robot.
- Lighting: IR sensors can sometimes be affected by strong ambient light. Test in consistent lighting conditions.
This program provides a solid foundation for your line-following robot. Once you have your hardware set up and connected to Scratch, you can start experimenting and seeing your code come to life!
🚧 Obstacle Avoiding Robot
- Ultrasonic sensors detect obstacles ahead.
- The robot turns away if it’s too close to an object.
- Understanding the “Obstacle Car” Idea Imagine you have a toy car that can “see” with a special sensor.
- Moving Forward: Normally, the car just drives straight ahead.
- Seeing an Obstacle: If its sensor detects something right in front of it (like a wall or a block), it immediately knows there’s an obstacle.
- Reacting: Once it “sees” the obstacle, it decides what to do:
- Maybe it stops. Maybe it backs up a little. Maybe it turns to the side to avoid the obstacle.
- Resuming: After it has reacted and is no longer “seeing” the obstacle, it can start driving forward again.
In Scratch, we make our Car sprite do exactly this.
How We Do This in Scratch (Simplified Steps)
We’ll use three main parts for our car’s brain:
- The Car’s Normal Driving Behavior
Your car needs to continuously try to move forward.
- What to do: When the green flag is clicked (when the game starts), set your car to a starting position.
- Use a forever loop to tell the car to move (some_number) steps. This makes it constantly try to move forward.
- The Car’s “Eyes” (Obstacle Detection)
This is how your car “sees” obstacles. We’ll make it check for a specific color, like the color of a wall you draw.
- What to do: In a separate forever loop (for the Car sprite), you’ll constantly ask: if then … else …
- If it IS touching the color: This means “obstacle detected!” When this happens, you need to tell the car to broadcast a message, like “obstacle ahead!”
- If it’s NOT touching the color: This means no obstacle.
- Crucial Step: After the if/else block, add a wait until > block. This stops the car from reacting over and over again while it’s still touching the obstacle.
- The Car’s “Brain” (Obstacle Reaction)
This is what happens when the car “hears” the “obstacle ahead!” message.
- What to do: Create a new script that starts with when I receive [obstacle_ahead].
- Inside this script, put blocks that make the car react:
- move (-10) steps (to back up slightly).
- turn (clockwise) (90) degrees (to turn and avoid). You can choose other angles or even random turns.
- After it has reacted, you need to allow the car to start moving forward again.
Let’s Build It Together in Small Parts: - Step 1: Set up your Project
- Go to https://scratch.mit.edu/ and click “Create.”
- Delete the default Scratch Cat sprite.
- Choose a Sprite: Click the “Choose a Sprite” button (the cat head icon) and select a Car sprite.
- Draw a Backdrop/Track: Click on “Choose a Backdrop” (the picture frame icon) and then click the “Paint” icon to draw your own.
- Use the rectangle tool to draw a “road” (e.g., grey). Then, draw some “walls” or “obstacles” on the edge of your road using a bright, distinct color (e.g., bright red or green). This is the color your car will sense.
- Make sure your car’s color is different from your obstacle color!
- Step 2: Make the Car Move Forward
- Make sure your Car sprite is selected.
- Go to the “Events” category (yellow blocks) and drag when green flag clicked to the scripting area.
- Go to the “Motion” category (blue blocks):
- Drag go to x: () y: () and place it under the when green flag clicked block. Put in some starting numbers, like x: -150 y: -100.
- Drag point in direction (90) and place it next. (90 is usually right).
- Drag set rotation style [left-right] or all around depending on how you want your car to turn.
- Now, from “Control” (orange blocks), drag a forever loop.
- Inside the forever loop, drag move (10) steps from “Motion.” Change 10 to 5 for a slower car.
- Your first script should look like this:
when green flag clicked
go to x: (-150) y: (-100)
point in direction (90)
set rotation style [left-right]
forever
move (5) steps
end Test it! Click the green flag. Your car should just drive off the screen. That’s good for now! - Step 3: Make the Car Detect a Color
We need to tell the car to stop moving forward if it hits the “wall” color. - Still with your Car sprite selected.
- Go to the “Variables” category (orange-red blocks) and click “Make a Variable.”
- Name it obstacle_detected.
- Select “For this sprite only.” Click OK.
- You’ll see obstacle_detected on your stage. You can uncheck the box next to it in the Variables palette if you don’t want to see it on the stage.
- Go back to your first script. We’ll modify it.
- Inside the forever loop, wrap the move (5) steps block with an if < > then block from “Control.”
- From “Variables,” drag obstacle_detected into the if condition.
- From “Operators” (green blocks), drag <( ) = ( )> and put it into the if condition. Put obstacle_detected on the left side and 0 (meaning no obstacle) on the right side.
- The first script now looks like this:
when green flag clicked
go to x: (-150) y: (-100)
point in direction (90)
set rotation style [left-right]
forever
if <(obstacle_detected) = [0]> then // ONLY move if no obstacle
move (5) steps
end
end
- Now, create a new script (separate from the first one) for detection:
- Drag another when green flag clicked block.
- Drag a forever loop under it.
- Inside the forever loop, drag an if < > then else block from “Control.”
- From “Sensing” (light blue blocks), drag touching color ( )? into the if condition.
- IMPORTANT: Click the colored square in touching color, then click the eyedropper tool. Use the eyedropper to click on the exact color of your “wall” or “obstacle” on the stage.
- Inside the if part (when it IS touching the color):
- From “Variables,” drag set [obstacle_detected v] to [1]. (1 means obstacle detected).
- From “Events,” drag broadcast [message1]. Click the arrow on message1 and select “New message…” Type obstacle ahead! and click OK.
- Inside the else part (when it is NOT touching the color):
- From “Variables,” drag set [obstacle_detected v] to [0]. (0 means no obstacle).
- Crucial Block: After the entire if/else block, from “Control,” drag wait until < >.
- Inside wait until, from “Operators,” drag not < >.Inside not, from “Sensing,” drag touching color ( )?. Again, use the eyedropper to pick your exact wall/obstacle color.
Your second script should look like this:
when green flag clicked
forever
if then // Use eyedropper to pick your wall color!
set [obstacle_detected v] to [1]
broadcast [obstacle ahead!]
else
set [obstacle_detected v] to [0]
end
wait until > // Use eyedropper again!
end
- Inside wait until, from “Operators,” drag not < >.Inside not, from “Sensing,” drag touching color ( )?. Again, use the eyedropper to pick your exact wall/obstacle color.
- Test it! Click the green flag. Your car should stop when it hits the obstacle color. Perfect!
- Step 4: Make the Car React
Now, let’s make the car do something when it detects an obstacle. - Still with your Car sprite selected.
- Create a third new script (separate from the other two).
- From “Events,” drag when I receive [obstacle ahead!] to the scripting area.
- Inside this script:
- From “Control,” drag stop [other scripts in sprite]. This temporarily stops the car from trying to move forward while it reacts.
- From “Looks” (purple blocks), drag say [Obstacle!] for (1) seconds (optional).
- From “Motion” (blue blocks):
- Drag move (-10) steps (the negative number makes it move backward).
- Drag turn (clockwise) (90) degrees (makes it turn right). You can change 90 to 45 for a smaller turn, or even use pick random ( ) to ( ) for varied turns.
- From “Variables,” drag set [obstacle_detected v] to [0] (to reset the flag so it can move forward again).
- From “Control,” drag start [other scripts in sprite]. This makes the car resume its normal forward movement.
Your third script should look like this:
when I receive [obstacle ahead!]
stop [other scripts in sprite]
say [Obstacle!] for (1) seconds // Optional
move (-10) steps
turn (clockwise) (90) degrees
set [obstacle_detected v] to [0]
start [other scripts in sprite] Test it! Click the green flag. Your car should now drive, stop, back up, turn, and then keep going!
Take your time with each step. If you get stuck on any specific block or concept, please tell us exactly what you’re confused about, and we’ll explain it in more detail!
🚥 Traffic Light Simulation
- Program LEDs to light up like real traffic lights.
- Use timers and loops to simulate traffic control.
A Traffic Light Simulation in Scratch is a classic project that’s great for learning about sequencing, timers, and loops. We’ll make three LEDs light up in the right order, just like a real traffic light.
Traffic Light Simulation in Scratch
This program will simulate a traffic light sequence: Green, then Yellow, then Red, and then back to Green, using specific timings.
- Project Setup in Scratch
- Open Scratch: Go to scratch.mit.edu/editor or open your Scratch Desktop app.
- Delete the default “Scratch Cat” sprite.
- Add Background (Optional but helpful): Click “Choose a Backdrop” (the picture frame icon) and select something like “City” or “Road.”
- Create Your “LED” Sprites
We’ll use three circle sprites to act as our traffic light’s LEDs.
- Create the Red Light:
- Click “Choose a Sprite” (the cat head icon).
- Click “Paint” (the paintbrush icon) to draw a new sprite.
- Select the circle tool.
- Choose a red fill color (make sure it’s a vibrant red).
- Draw a good-sized circle in the drawing area.
- Go to the “Code” tab. In the sprite list, rename this new sprite to Red Light.
- Go to its “Costumes” tab. Duplicate the costume (right-click on the costume thumbnail and choose “Duplicate”).
- Select the duplicated costume. Change its fill color to a darker, “off” red (like a dull grey-red or just grey). Rename this costume off. Rename the bright red costume on.
- Create the Yellow Light:
- Right-click on your Red Light sprite in the sprite list below the stage.
- Choose “Duplicate.”
- Rename the new sprite to Yellow Light.
- Go to its “Costumes” tab. Change the “on” costume’s fill color to a vibrant yellow.
- Change the “off” costume’s fill color to a darker, “off” yellow (or grey).
- Create the Green Light:
- Right-click on your Red Light sprite (or Yellow Light) in the sprite list.
- Choose “Duplicate.”
- Rename the new sprite to Green Light.
- Go to its “Costumes” tab. Change the “on” costume’s fill color to a vibrant green.
- Change the “off” costume’s fill color to a darker, “off” green (or grey).
- Arrange Your Lights: On the stage, drag your three light sprites to stack them vertically like a real traffic light: Red on top, Yellow in the middle, Green on the bottom.
- Code for Each Light Sprite
Each light needs its own simple script to turn itself “on” or “off” when it receives a specific message.
A. Code for Red Light Sprite
Make sure Red Light is selected.
when I receive [turn red on]
switch costume to [on]
when I receive [turn red off]
switch costume to [off]
when green flag clicked // Initial state
switch costume to [off]
B. Code for Yellow Light Sprite
Make sure Yellow Light is selected.
when I receive [turn yellow on]
switch costume to [on]
when I receive [turn yellow off]
switch costume to [off]
when green flag clicked // Initial state
switch costume to [off]
C. Code for Green Light Sprite
Make sure Green Light is selected.
when I receive [turn green on]
switch costume to [on]
when I receive [turn green off]
switch costume to [off]
when green flag clicked // Initial state
switch costume to [on] // Traffic lights usually start with green
- Code for the Traffic Light Controller (Main Script)
We’ll use a new, invisible sprite to control the sequence of the lights. This keeps your main logic in one place.
- Create a Controller Sprite:
- Click “Choose a Sprite” (the cat head icon).
- Select any simple sprite, like a “Button” or a “Dot.”
- Go to the “Code” tab. Rename this sprite Controller.
- Go to the “Looks” category (purple blocks) and drag hide under a when green flag clicked block for this sprite. This makes the controller invisible.
- Controller Logic:
- Make sure your Controller sprite is selected.
when green flag clicked
hide // Keep this controller sprite invisible
forever
    // 1. Green Light Phase
    broadcast [turn red off] // Make sure Red is off
    broadcast [turn yellow off] // Make sure Yellow is off
    broadcast [turn green on] // Turn Green ON
    wait (5) seconds // Stay green for 5 seconds (adjust time here!)

    // 2. Yellow Light Phase (Transition from Green to Red)
    broadcast [turn green off] // Turn Green OFF
    broadcast [turn yellow on] // Turn Yellow ON
    wait (2) seconds // Stay yellow for 2 seconds (adjust time here!)

    // 3. Red Light Phase
    broadcast [turn yellow off] // Turn Yellow OFF
    broadcast [turn red on] // Turn Red ON
    wait (5) seconds // Stay red for 5 seconds (adjust time here!)

    // (Optional: Add a brief "all off" or "red+yellow" for a realistic transition from Red to Green)
    // Example: Red + Yellow before Green (common in some countries)
    // broadcast [turn yellow on]
    // wait (1) seconds
    // broadcast [turn red off]
    // broadcast [turn yellow off]

    // The loop will now go back to the "Green Light Phase"
end- Run Your Simulation!
- Click the green flag button above the stage.
- Your traffic lights should start their sequence:
- Green for 5 seconds.
- Yellow for 2 seconds.
- Red for 5 seconds.
- Then, it repeats, going back to Green.
Easy Teaching Points & Tips: - Costumes as States: Explain that we’re using two different “costumes” (pictures) for each light to show if it’s “on” or “off.” This is a common trick in Scratch.
- Broadcasting for Communication: Emphasize that broadcast blocks are like sending a message to all sprites. Only the sprites listening for that specific message (when I receive […]) will react. This keeps the code organized!
- wait for Timers: Show how the wait () seconds block creates the time delays, just like real traffic lights.
- forever for Looping: Explain that the forever loop makes the traffic light sequence repeat endlessly, simulating continuous traffic control.
- The Controller Sprite: Why have a separate “Controller”? It keeps the main timing and sequence logic in one place, making it easy to change timings without touching the individual light sprites. It also makes the code cleaner.
- Adjusting Timings: Encourage students to change the numbers in the wait blocks to see how it affects the flow of traffic. What happens if Yellow is too short or too long?
- Adding Complexity (Next Steps):
- Pedestrian Button: Add another sprite for a pedestrian button that, when clicked, changes the light sequence.
- Two Intersecting Roads: Duplicate the whole setup to create two sets of traffic lights for an intersection, making sure they switch in opposite orders (e.g., when one is Green, the other is Red).
This program provides a clear, step-by-step way to teach traffic light simulation using Scratch!
🎵 Music Playing Robot
- Play melodies using a buzzer.
- Control sound blocks based on button inputs.
let’s make a Music Playing Robot in Scratch! This project will teach you how to make your robot play different melodies based on which button you press.
This project relies on having a physical robot (like one built with an Arduino, ESP32, or Raspberry Pi Pico) connected to Scratch using a special Scratch Extension. This extension lets Scratch “talk” to your robot’s sensors (buttons) and actuators (buzzer).
Understanding the Music Playing Robot Concept
Imagine your robot has:
- “Ears” (Buttons): These are input devices. When you press a button, the robot “hears” it.
- A “Voice” (Buzzer): This is an output device. The robot uses it to make sounds (play notes).
Your Scratch program will be the robot’s brain. It will constantly “listen” for button presses, and when it detects one, it will tell the buzzer to “sing” a specific melody.
What You’ll Need (Hardware & Software)
To make this a real, physical robot project: - A Microcontroller: (e.g., Arduino Uno, ESP32, Raspberry Pi Pico, micro:bit). This is the small computer board that will control your robot.
- A Buzzer: A small component that makes sound when electricity is passed through it.
- Buttons: One or more push buttons.
- Wiring: Wires to connect the buttons and buzzer to your microcontroller.
- Scratch Link / Specific Scratch Extension: This is CRITICAL. Scratch itself can’t directly control physical components. You need to enable an extension that allows Scratch to communicate with your microcontroller.
- For Arduino: You’d typically use “Scratch Link” (for Scratch Desktop) or a platform like “mBlock” (which has its own Scratch-like environment).
- For micro:bit: There’s a dedicated micro:bit extension in Scratch.
- For Raspberry Pi Pico: Look for extensions like “Pico-Go.”
- The exact Scratch blocks for reading buttons and playing notes will depend on the extension you use.
Easy Teaching with Scratch Blocks (Program Logic)
For this guide, I’ll use generic block names for reading sensor pins and playing sounds that are common across extensions. You’ll replace them with the actual blocks from your chosen extension.
Let’s assume you have: - Button 1 connected to a digital pin (e.g., Pin 2)
- Button 2 connected to another digital pin (e.g., Pin 3)
- A Buzzer connected to an analog/PWM pin (e.g., Pin 9 or Pin A0)
- Project Setup in Scratch
- Open Scratch: Go to scratch.mit.edu/editor or open your Scratch Desktop app.
- Delete the default “Scratch Cat” sprite.
- Add Your Microcontroller Extension:
- Click the “Extensions” button in the bottom-left corner (the blue square with two white blocks).
- Select the extension for your microcontroller (e.g., “Arduino,” “micro:bit,” “Pico-Go,” etc.).
- This will add new blocks to your palette for reading pins and controlling components.
- Create a Robot Sprite:
- Click “Choose a Sprite” and select a “Robot” or “Button” sprite, or even draw a simple circle. Rename it Robot Controller. This sprite will hold all the main code.
- Main Robot Controller Script (The Brain)
This script will constantly check if any button is pressed and, if so, tell the robot to play a melody.
Make sure your Robot Controller sprite is selected.
when green flag clicked
// Initial Setup (optional, but good practice)
// Some extensions might have blocks to initialize pins or stop all sound.
// Example: [Stop playing note on pin (9)] or [Set digital pin (2) to input] forever // This loop makes the robot constantly “listen” for button presses// --- Check Button 1 (e.g., plays "Happy Birthday") --- if <Read digital pin (2) = [HIGH]> then // Or [1] for pressed, depending on your sensor/extension play melody 1 // Call a custom block to play melody 1 wait (0.5) seconds // Short delay to prevent re-triggering immediately end // --- Check Button 2 (e.g., plays "Twinkle Twinkle Little Star") --- if <Read digital pin (3) = [HIGH]> then // Or [1] for pressed play melody 2 // Call a custom block to play melody 2 wait (0.5) seconds // Short delay end // You can add more 'if' blocks for more buttons and melodies!end - Define Your Melodies (Custom Blocks)
Custom blocks (also called “My Blocks” in Scratch) help organize your code. We’ll create one for each melody.
- Go to the “My Blocks” category (light red blocks). Click “Make a Block.”
- For Melody 1: Name the block play melody 1. Click “OK.”
- A new block define play melody 1 will appear in your scripting area.
- For Melody 2: Click “Make a Block” again.
- Name the block play melody 2. Click “OK.”
- Another define play melody 2 block will appear.
- Code for Melody 1 (e.g., “Happy Birthday” snippet)
Now, we’ll tell the define play melody 1 block what sequence of notes to play using your extension’s “play note” blocks.
How Notes Work: Your extension will likely have a block like play note ( ) on pin ( ) for ( ) beats.
- Note: This is usually a number (e.g., 60 for C5, 62 for D5, etc.) or a note name from a dropdown.
- Pin: The digital/PWM pin your buzzer is connected to (e.g., 9, A0).
- Beats: How long the note plays (e.g., 0.5 for a quick note, 1 for a longer note).
define play melody 1
// Example: A short snippet of “Happy Birthday” (replace with your extension’s specific blocks)
play note (60) on pin (9) for (0.5) beats // C5
play note (60) on pin (9) for (0.5) beats // C5
play note (62) on pin (9) for (1) beats // D5
play note (60) on pin (9) for (1) beats // C5
play note (65) on pin (9) for (1) beats // F5
play note (64) on pin (9) for (2) beats // E5
// Add more notes for the full melody
play note (0) on pin (9) for (0.2) beats // Play silence (note 0) for a small pause
- Code for Melody 2 (e.g., “Twinkle Twinkle Little Star” snippet)
define play melody 2
// Example: A short snippet of “Twinkle Twinkle Little Star” (replace with your extension’s specific blocks)
play note (60) on pin (9) for (0.5) beats // C5
play note (60) on pin (9) for (0.5) beats // C5
play note (67) on pin (9) for (0.5) beats // G5
play note (67) on pin (9) for (0.5) beats // G5
play note (69) on pin (9) for (0.5) beats // A5
play note (69) on pin (9) for (0.5) beats // A5
play note (67) on pin (9) for (1) beats // G5
play note (0) on pin (9) for (0.2) beats // Play silence for a pause
Important Things to Remember & Easy Teaching Points:
- Hardware First: You absolutely must have your microcontroller (Arduino, micro:bit, etc.), buttons, and buzzer wired up correctly before you can test this Scratch program with a real robot.
- Scratch Extension Match: Make sure the Scratch extension you load matches your microcontroller board. The “Read digital pin” and “play note on pin” blocks will look different depending on the extension.
- Example (Arduino via Scratch Link): You might find blocks like digital read pin [2] and play tone on pin [9] for [0.5] secs.
- Example (micro:bit): You might find button [A] pressed? and play note [Middle C] for [0.5] beats.
- Pin Numbers: Double-check that the pin numbers in your Scratch code (e.g., (2), (3), (9)) match the actual physical pins you’ve connected your buttons and buzzer to on your microcontroller.
- Sensor Readings (HIGH/LOW or 0/1):
- When you press a button, does your sensor read HIGH (or 1) or LOW (or 0)? You might need to experiment or check your sensor’s documentation. If it reads LOW when pressed, change Read digital pin (2) = [HIGH] to Read digital pin (2) = [LOW].
- Notes and Beats:
- Notes: Scratch often uses MIDI note numbers (e.g., 60 is Middle C). Your extension might have a dropdown to pick note names directly.
- Beats: 1 beat is usually a quarter note at a default tempo. Adjust 0.5 for quicker notes, 2 for longer notes, etc., to get the rhythm right.
- wait (0.5) seconds after melody call: This small wait block is important! Without it, if you hold the button down, the robot might try to play the melody hundreds of times a second, which won’t sound right. This delay gives it a moment before it checks the button again.
- Silence (Note 0): Playing note 0 or using a specific “stop sound” block from your extension can be used to create pauses in your melody.
This complete program structure will let your robot respond to button presses by playing tunes! Happy coding and building!
🎓 Educational Benefits of Scratch Robotics
| Skill Developed | Description |
|---|---|
| Problem Solving | Students learn how to debug and improve their own code. |
| Logical Thinking | They understand sequencing, conditions, and loops. |
| Creativity | Encourages building custom robots and games. |
| STEM Integration | Blends science, tech, engineering, and math concepts. |
🏁 Final Thoughts
Scratch offers an accessible and fun way to introduce children and beginners to the world of robotics. By combining logic with creativity, learners of all ages can build smart machines and learn real-world problem-solving—all through play.